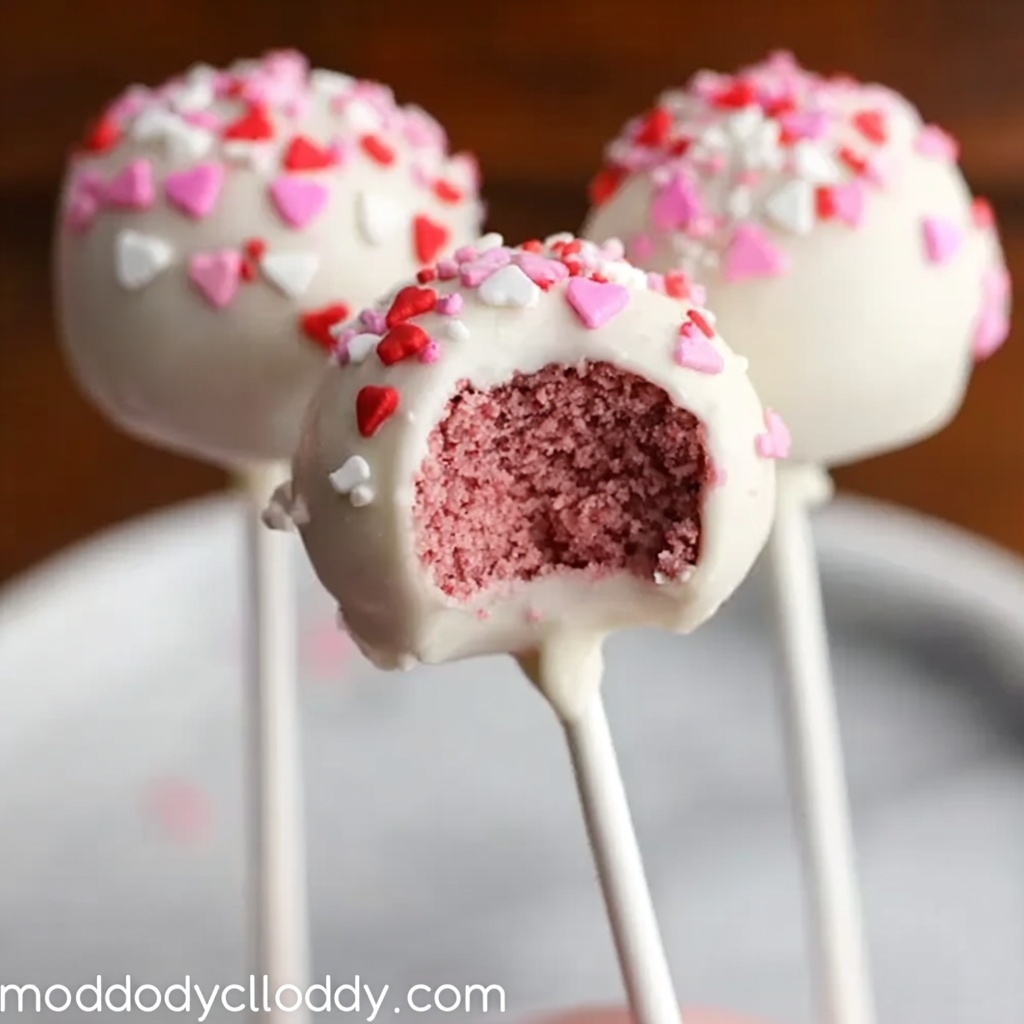
If you’re looking to impress on a special occasion or simply want to enjoy a sweet treat with a fun twist, this Valentine Cake Pops Recipe is your new best friend. These bite-sized delights combine moist cake, creamy frosting, and a glossy shell of chocolate, all topped off with festive heart-shaped sprinkles that bring a pop of color and joy. They’re perfect for sharing love, laughter, and smiles in each little bite, making your celebration extra memorable and delicious.
Ingredients You’ll Need
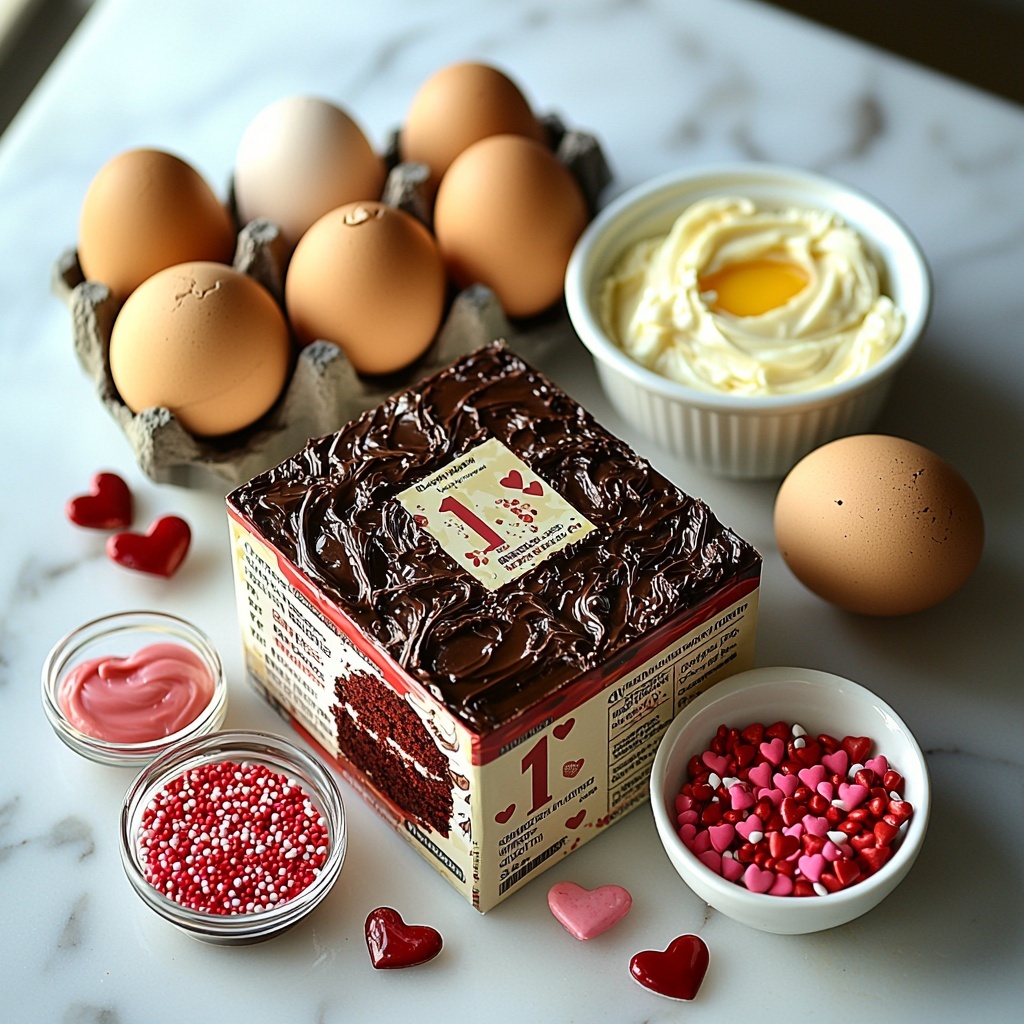
Gathering the right ingredients is the first step to making these charming cake pops. Each ingredient is simple but crucial, lending the perfect texture, flavor, and festive flair that turn ordinary cake into irresistible treats.
- 1 box (15.25 oz) cake mix (chocolate, vanilla, or red velvet): This is the base of your cake pops, so choose your favorite flavor to set the tone.
- 3 large eggs: Eggs help bind everything together and add richness to the cake.
- 1/2 cup unsalted butter, melted: Butter adds moisture and a tender crumb to your cake.
- 1/2 cup frosting (vanilla or cream cheese): The frosting binds the cake crumbs and adds a creamy sweetness.
- 1 cup melting chocolate (red or pink): This coats the pops with a smooth, shiny finish and a burst of color perfect for Valentine’s Day.
- 1/4 cup heart-shaped sprinkles: These bring festive, charming accents that make each pop a little celebration on a stick.
How to Make Valentine Cake Pops Recipe
Step 1: Bake the Cake
Start by preheating your oven to 350°F (175°C). Mix the cake mix, eggs, melted butter, and water according to the package instructions, ensuring everything is smooth and well combined. Pour the batter into a greased pan and bake for 25 to 30 minutes until the cake turns golden and a toothpick comes out clean. Baking a moist and flavorful cake is the foundation of your Valentine Cake Pops Recipe, so take your time here.
Step 2: Crumble the Cake
Once the cake has cooled completely, crumble it into fine crumbs using your hands or a fork in a large mixing bowl. This step transforms the cake into the perfect texture for combining with frosting, allowing the pops to hold their shape beautifully.
Step 3: Mix in Frosting
Gradually mix in the frosting a little at a time. You’re aiming for a mixture that sticks together easily without being overly wet or sticky. This balance is essential to get perfectly shaped cake balls that won’t fall apart when dipped in chocolate.
Step 4: Form and Chill the Balls
Roll tablespoon-sized portions of the cake mixture into smooth balls and place them on a parchment-lined sheet. Pop the tray into the fridge and chill for at least an hour. This chilling step firms up the cake pops, making them easier to handle for dipping.
Step 5: Dip in Melting Chocolate
Melt your chosen chocolate according to package directions until it’s silky and smooth. Dip each chilled cake ball into the melted chocolate, fully coating the surface, then place them back onto the parchment paper. The chocolate shell forms a delightful texture contrast with the soft center of the cake pops.
Step 6: Decorate and Chill Again
Before the chocolate sets, generously decorate the cake pops with heart-shaped sprinkles. This adds festive charm and a little crunch. After decorating, chill the pops for another hour to let everything set perfectly, ensuring a professional finish and easy handling when serving.
How to Serve Valentine Cake Pops Recipe
Garnishes
While heart-shaped sprinkles are classic, you can elevate your presentation by adding edible glitter, mini chocolate chips, or colored sugar crystals. These garnishes add texture, sparkle, and even more festive delight to your Valentine Cake Pops Recipe.
Side Dishes
Serve these pops alongside a light fruit salad, a creamy vanilla yogurt dip, or even a hot chocolate bar. The contrast between the rich cake pops and these fresh or creamy sides makes every bite balanced and refreshing.
Creative Ways to Present
Arrange your Valentine Cake Pops Recipe on a decorative stand or place them upright in a festive vase filled with colored sand or candy. Wrapping sticks in ribbons or placing each pop in a mini cupcake liner adds extra flair, making them as eye-catching as they are delicious.
Make Ahead and Storage
Storing Leftovers
Place leftover cake pops in an airtight container and store them in the refrigerator to keep the chocolate coating firm and the cake fresh. Proper storage should keep them delicious for up to 3 days.
Freezing
For longer storage, freeze the cake pops in a single layer on a baking sheet until solid, then transfer to an airtight container or freezer bag. When frozen, they keep well for up to 1 month without compromising texture or flavor.
Reheating
Since cake pops are best enjoyed chilled, reheating isn’t necessary. If you prefer them slightly softer, leave them at room temperature for 15 to 20 minutes before serving to let the chocolate coating mellow just a bit.
FAQs
Can I use homemade cake instead of a boxed mix?
Absolutely! Homemade cake works beautifully in this Valentine Cake Pops Recipe and adds a personal touch. Just make sure the cake is moist and cooled before crumbling.
What kind of frosting is best for mixing with cake crumbs?
Vanilla or cream cheese frosting works best since they add creaminess and sweetness without overpowering the cake’s flavor.
How do I prevent the cake pops from falling off the stick?
Dip the tip of each stick in melted chocolate before inserting it into the cake ball. This acts like glue when it hardens, securing the pop onto the stick.
Can I reuse leftover melted chocolate?
You can keep leftover melted chocolate warm over a double boiler, but if it cools and hardens, gently re-melt it with low heat to avoid burning.
Are Valentine Cake Pops Recipe suitable for kids’ parties?
Definitely! They’re colorful, fun-sized, and less messy than traditional cake slices, making them perfect treats for kids and adults alike.
Final Thoughts
Making these Valentine Cake Pops Recipe is a joyful way to add sweetness and charm to any celebration. Whether you’re baking for a loved one or just treating yourself, the process is as rewarding as the delicious results. Give this recipe a try, and watch how a few simple ingredients transform into irresistible, festive little bites of happiness. You’ll be spreading love and smiles one cake pop at a time!
Print
Valentine Cake Pops Recipe
- Prep Time: 20 minutes
- Cook Time: 30 minutes
- Total Time: 50 minutes
- Yield: 12 servings
- Category: Dessert
- Method: Baking
- Cuisine: American
Description
Celebrate love with these adorable Valentine Cake Pops! Made from moist cake crumbs mixed with creamy frosting, then dipped in vibrant red or pink melting chocolate and sprinkled with festive heart-shaped decorations, these bite-sized treats are perfect for parties, gifts, or any sweet occasion.
Ingredients
Cake Pops
- 1 box (15.25 oz) cake mix (chocolate, vanilla, or red velvet)
- 3 large eggs
- 1/2 cup unsalted butter, melted
- Water as per cake mix package instructions
- 1/2 cup frosting (vanilla or cream cheese)
Coating and Decoration
- 1 cup melting chocolate (red or pink)
- 1/4 cup heart-shaped sprinkles
Instructions
- Prepare the cake batter: Preheat your oven to 350°F (175°C). In a large bowl, combine the cake mix, eggs, melted butter, and water according to the package instructions. Mix until smooth and well incorporated.
- Bake the cake: Pour the batter into a greased baking pan. Bake for 25 to 30 minutes or until the cake is golden and a toothpick inserted in the center comes out clean. Remove from the oven and allow it to cool completely.
- Crumble the cake: Once the cake is fully cooled, crumble it finely into a large mixing bowl using your hands or a fork, ensuring there are no large chunks.
- Mix in frosting: Gradually add the frosting to the cake crumbs, mixing until the mixture can be pressed together easily but is not overly moist or sticky. This will help the cake pops hold their shape.
- Form cake balls and chill: Roll tablespoon-sized portions of the mixture into balls. Place them on a baking sheet lined with parchment paper and chill in the refrigerator for at least one hour to firm up.
- Melt the coating chocolate: Melt the red or pink melting chocolate according to the package instructions, usually using a microwave in short intervals or a double boiler, stirring frequently until smooth.
- Coat the cake pops: Dip each chilled cake ball into the melted chocolate, ensuring it is fully coated. Place the coated cake pops back on the parchment-lined tray.
- Decorate and set: Immediately sprinkle the heart-shaped decorations over the wet chocolate coating before it sets. Return the cake pops to the refrigerator and chill for another hour until the coating is firm.
Notes
- You can customize cake flavors and frosting types to your preference, such as using cream cheese frosting for red velvet cake.
- For easier handling, insert lollipop sticks before dipping if desired, but these cake pops can also be served without sticks.
- Ensure cake pops are well chilled before dipping to prevent them from falling apart.
- Use quality melting chocolates or candy melts for a smooth and durable coating.
- Store cake pops in an airtight container in the refrigerator for up to 3 days.


